Klippie wrote:No one can help...

Must all be busy...worrisome economy, tax time coming here in the USA, wildfires in Australia(terrible to think some assholes may have started those fires intentionally...I've been in a minor wildfire once, incredible how fast it moves). Anyway...
Glass - remove module(duh!), turn on your stove/oven to 350 f.(176 Celsius), set the watch in the center of the oven away from any vents from the gas burners or away from the coils if electric. Leave in for about 10 minutes, grab with a rag and gently push glass out from inside. Let all cool down, then carefully scrape all the epoxy out of the lip in the case, especially out of the corners. You can take a sharp razor to the underside and sides of the glass to get most of the epoxy off, but if there is any chipping the razor can sometimes snag it., so sometimes the better path is to use a piece of 600 grit sandpaper and gently sand of the last bits on the sides below the bevel and along the underside edge.
The brushing - usually goes from side to side. You can get very good results with those abrasive pads that are sold nearly everywhere as a replacement for steel wool. The green grade is a good choice for your first foray - the burgundy grade is a little courser so one has to be careful if using those. Best to stay with the green on gold. The most bedeviling thing you will have to get used to is keeping your lines straight with each pass - you'll think your hand is moving straight but really it will be on a slight angle. Sort of like when you get a new computer mouse and they have you calibrate it to accommodate your particular eye-to-hand misalignment.

Lay a larger piece of the abrasive pad in your hand and draw the entire face of the case across it in one smooth, gently movement, then see how your alignment is - don't finish off the front, just take a few swipes to get the worst offender scratches. then do the sides in smooth strokes. The buttons are a problem - you can'[t do an absolutely perfect job with them in, then again, they have generally protected the case slightly. Rather than get into full button removal, you can opt to do the area above and below the buttons gently, then take a few strokes trying to "catch" the whole side in one smooth pass. Not perfect but can be quite nice. After you have the sides down, work on the band. From one side to the other in smooth strokes. I'd suggest holding the band in the palm of your hand and coming down with the abrasive pad on just 2-3 links at a time, not banging into the edge, but "landing" almost in the middle of the link where the worst wear is - inevitibly you'll catch some of the edge anyway, but are less likely to wear/tear the gold filled edge. Finally, give the case face a few passes to finish it off and remove any marks from working the sides. and band
Glue your glass back in with epoxy - I'd recommend the 5 minute type as it is usually the weakest. Easiest to remove if need arises later, plenty strong to hold in the glass. Check the fit of the glass without forcing before mixing the glue up - your brushing may have introduced a slight burr to the crystal opening, which you can remove by carefully dragging a hardened steel item along the inside edge of the groove -small screwdriver is perfect, just don't hop out of the groove and mess up your beautiful finish.

Clean off the excess epoxy while wet with any type of stronger alcohol(isopropal, whisky,Scotch..whatever )
Oh, and scrub the band with some good detergent before starting the brushing and give it a good rinse afterwards. Rinse around the buttons good, in case you got any grit into them. Disassembling the buttons is a pain, generally takes a small torch or very large soldering iron to generate enough heat to unsolder the caps on the inside. And once again, you'll need to have the glass out, which is why you might want to avoid that thrill on your first foray.

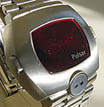
Hope that helps. And congrats on the first Pulsar - they are a nice piece of kit. Lucky dog - that ONE Pulsar will be more joy for you than a cabinet full for some others.